Tag Archives: Butterfly

Shaker Card Kit

I saw this card kit at one of my favorite stores and decided to get a couple to put together. I bought several different ones so we will talk about the others later.

This one was a shaker card, meaning you put glitter or something small behind a piece of acetate. Everything was included in the kit to make 6 cards, 2 of each design.

Box that the card kit came in.


I should tell you that I have never made a shaker card. I know how to but haven’t really ever made one.  I didn’t think about how much of the glitter/confetti to put in. The directions didn’t say.  I saw that the kit comes with 6 cards and 2 packs of confetti, so a third of the pack of glitter per card?

Card base and front. Glitter


Well, those of you with experience making these will know that it was way too much!!! I didn’t really get it right until about halfway through.

Using the mathematical approach. WAY TOO many glitters!
Left: Correct Amount. Right: TOO much. Lol


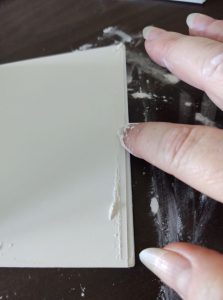
My next mishap was the aligning. They had all the adhesive already so I just peeled and lined up the card front. Well, I guess I’m not too good at that either!!! They are all off at least a little! Then at least one side is sticky. My solution was of course good old baby powder!

It has its own adhesive for the cover.
Using baby powder to cover the adhesive overhang.


I’m posting this to tell you all that no one gets it right the first time and that’s ok!!! If you get a card from me and you can’t read the sentiment because of too much bling in the shaker card, know that I love you so much that I wanted you to have a BIG, BIG party!!!!

Full set of shaker cards, in varying degrees of glitterfied!


Thanks

Lu

P.S. If you would like to get an email notification when I post a new blog, please hit the subscribe button!!

[subscribe2]

0
0

Star Explosion Card


This week I wanted to try a new folded card. So I tried this star explosion one. The instructions were a little confusing for me, but I think it still turned out cute! I am going to try a couple more so I can see if I can get it a little easier and a little more straight!! I’ll keep posting as I do!

I hope you are enjoying seeing what I am working on each week!


Lu

P.S. If you would like to get an email notification when I post a new blog, please hit the subscribe button!!

[subscribe2]

0
0

Easel Card

0712161026[1]0712161027b[1]

Easel cards have been around for a long time but I decided to make one for a friend today. They are very simple and can be made in a variety of sizes. They take no special tools and work up super fast. Mine today is a 5×5 size.

So simple instructions: One piece of cardstock cut 5×10 (that is finished size one direction and twice finished size the other direction. This is pretty much the rule for all cards.) Fold it in half so you have the 5×5 square. Then take the top of the card and fold it in half again, so the edge meets up with your previous fold. Now take another piece of paper (mine was the light blue chevron) and cut it to size. If you want it to cover the whole front it is 5×5. Glue this piece to the bottom section of the front of the card. The only thing left to do is add something to the inside so that it holds the easel part in place, I used a flower. The rest of the card is just adding what you like to complete the look. Mine is pretty simple, but I like the clean look.

Questions? Just let me know, I’d be happy to help!


Lu

P.S. If you would like to get an email notification when I post a new blog, please hit the subscribe button!!

[subscribe2]

0
0